What Can a Teapot Teach You About Rendering?
Learn how to use VRay Proxy to import geometry from an external mesh through this teapot example in Vray 3.2 for 3ds Max in this free tutorial.
Learn how to build a room tag with separate labels in Revit 2016 in this free Black Spectacles tutorial.

A free tutorial from the Black Spectacles Course Custom Families and Parameters in Revit 2016.
In this Black Spectacles FREE tutorial, you will learn how to build a room tag with separate labels in Revit 2016. This tutorial is part of the Black Spectacles course on Custom Families and Parameters in Revit 2016 in which you will learn how to utilize the different types of families and parameters to quickly and efficiently create complex and customized designs in your projects.
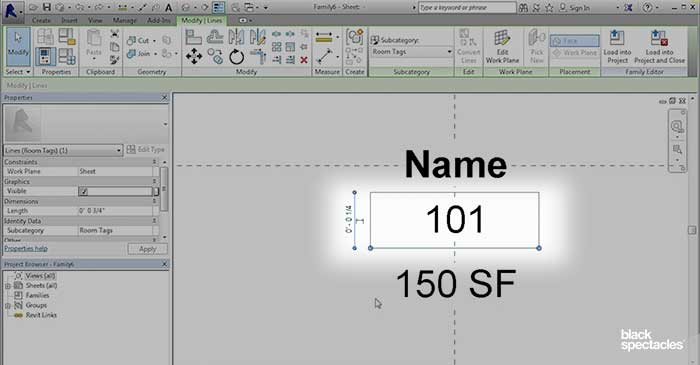
To start, open up a new family under “Annotations” and go to “Room Tag.”
Instead of just putting it all into one label, you’re going to separate it out as three separate labels. This is going to provide much more flexibility. Go to “Create” and click “Label” and it's asking for an insertion point. Go ahead and randomly click anywhere and then select “Name” from the available parameters and add it to the label parameters. Because you're doing one at a time, that's all is required. There's no break because there's no other line. It's just “Name.” So click “OK” and if you zoom in real close, you can see it. Drag it down to the center for now.
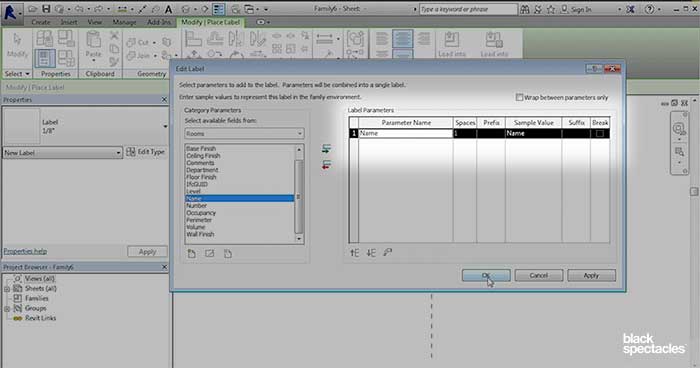
Repeat that process by going back to “Create” and add another label. This one is going to be for “Number,” and click “OK.” You can leave it where it is for now. Go back to “Create” once more, add a label and this one should be “Area.”
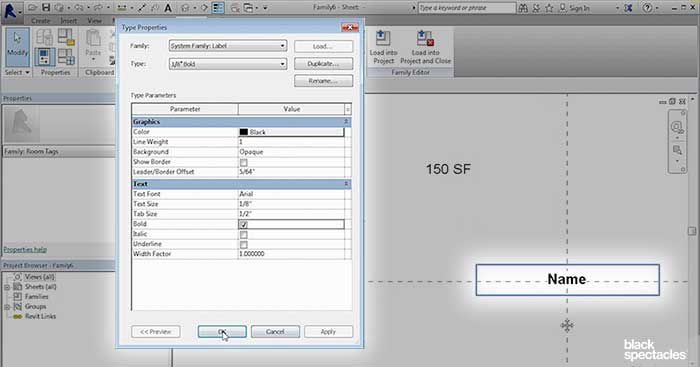
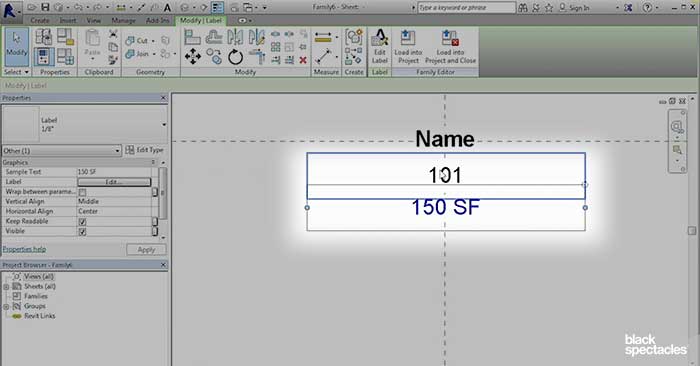
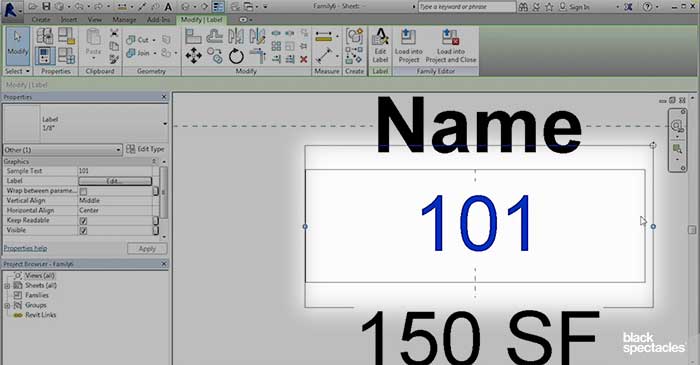
Now there are three separate items. And because they are three separate items, it allows you to do things to them individually. So for example, if you want the name to be in bold, but not the others, just click on “Name,” the “Edit Type.” You will want to duplicate it because you don't want to overwrite it - just want to duplicate it. Name it “1/8 Bold.” Then select “Bold,” and click “OK.” And now, the Name is in bold but the other two are just regular texts.
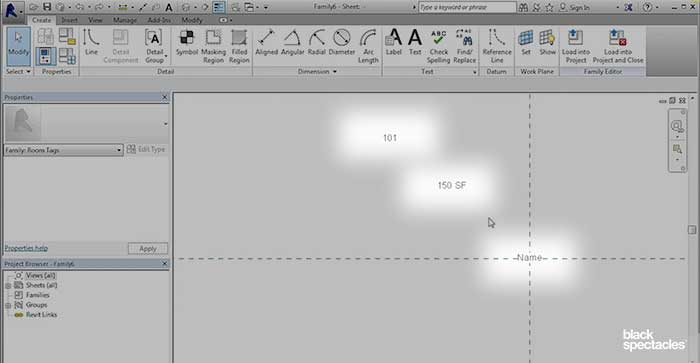
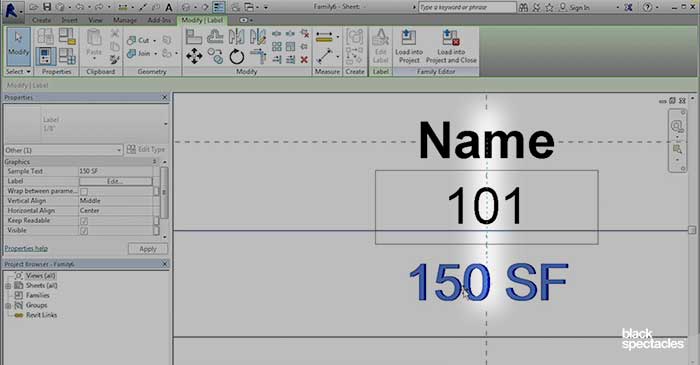
When you have separate labels, the labels themselves will snap to each other. So if you move “Number” underneath “Name,” you can see that it sort of snaps to the name. So you can get these things to align onto themselves but they won't unfortunately snap to the reference plane. Next, snap “Area” underneath “Number.”
Most ring tags typically have a visible box that goes around the number. So if you want to do any graphic like that, you're going to go to “Create” and just use lines. But you also have different subcategory options. If you click on “Room Tags,” you can just draw a rectangle around the number.
But now you have to define the size, the shape, and the position of that rectangle.
It's not really necessary to lock it down with parameters. Instead, you can just set this with temporary dimensions. You can change them to be 1/8” on each side so the box is centered, and set the height to be 1/4.”
Because this is a label and because it's sort of fixed, you don't really have to worry about locking the size of that box down. It will just stay that size.
But you can move things around until they are the way you want them to look. To do that, highlight the box and the “Number” label, and just nudge that up a little bit using the arrow keys. And then nudge the “Area” up a bit.
Once you get it graphically looking the way that you want it to be, one other thing to check is the size of the boxes, making sure that the “Name” box is an appropriate length. The “Number” will pull that in.
The trick to getting that number centered inside the box is as you pull the box in, you can see how the box is hanging out on one side but it's lined up on the other side. So that tells you that the number is not actually centered within that box, so then use the nudge tool to slide it over.
And then if you know that the “Number” is now in the middle, then you can click on the “Name,” and slide that over and it should snap to the new position of the “Number” and slide that over. It's a very faint blue dashed line that appears to tell you that you're snapped. Now all three of those three labels are lined up to one another.
Watch the video here:
Learn how to use VRay Proxy to import geometry from an external mesh through this teapot example in Vray 3.2 for 3ds Max in this free tutorial.
Learn about setting the Camera and Environment Options in Rhino 5 for Vray 3.2 in this free tutorial.
Learn about applying the Vray Toon Effect in Vray 3.2 for 3ds Max in this free Black Spectacles tutorial.